Introduction to Content Entries
Once the Content Models define the structure, the actual content that appears on the website is stored in Entries.
Think of it like this:
- Content Model = Template (like “Team Member”)
- Content Entry = Actual content (like “Jane Doe – Tech Lead”)
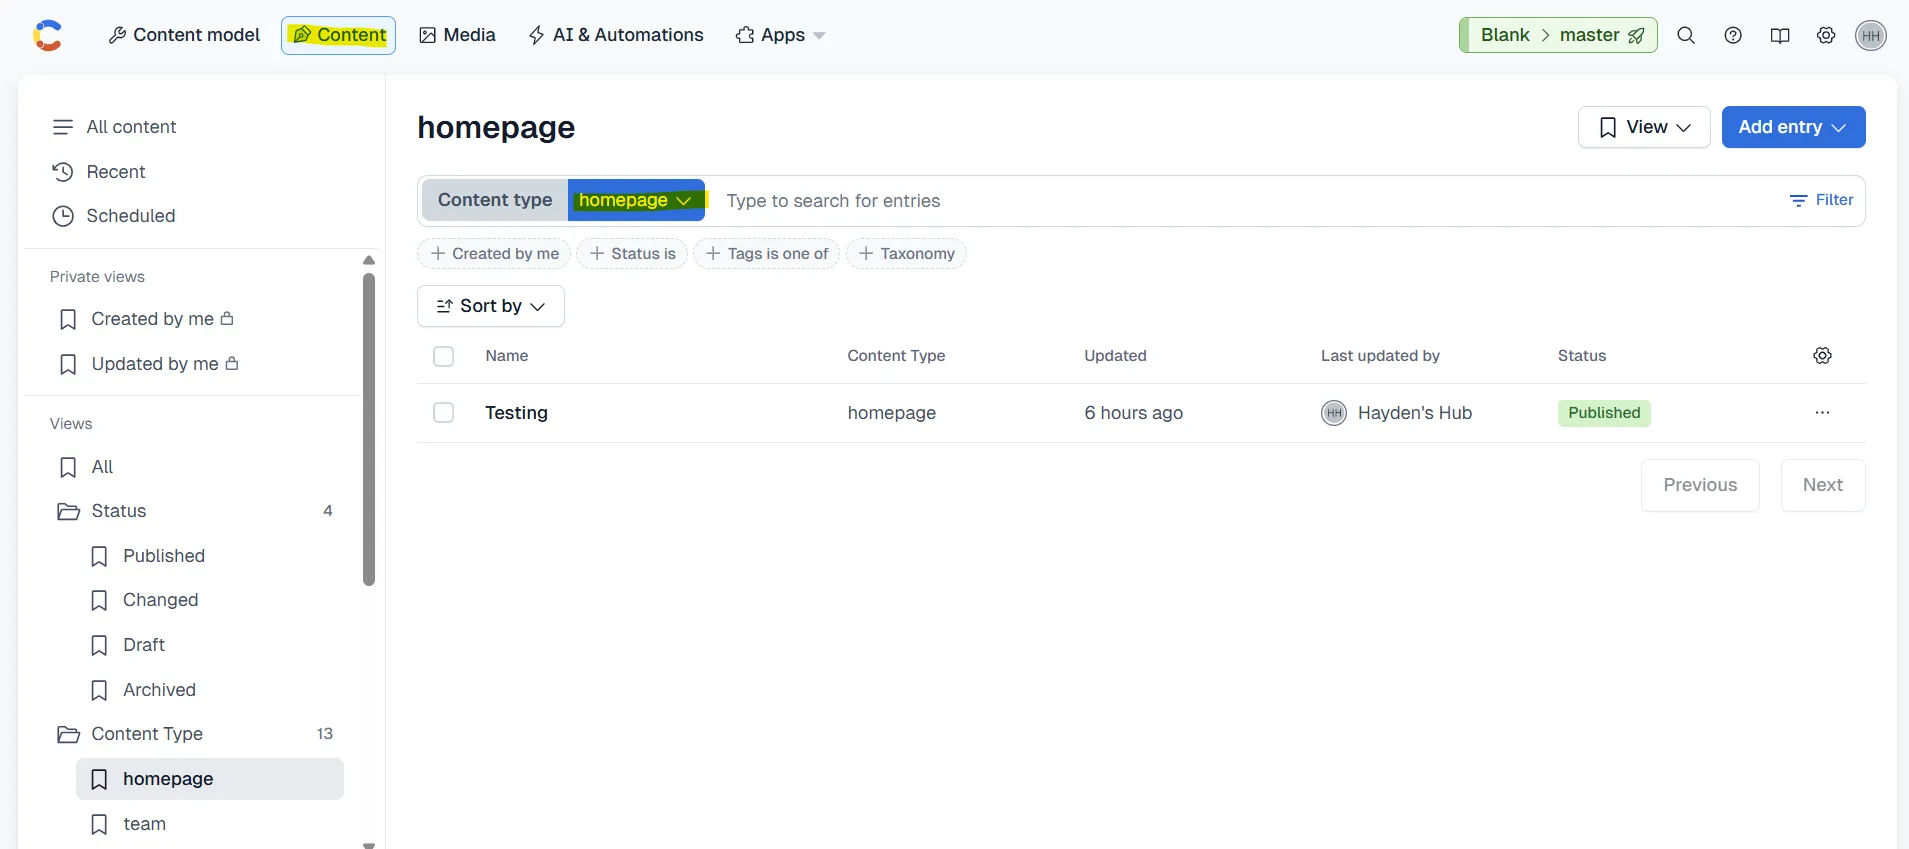
Where to View Entries
Section titled “Where to View Entries”-
Log in to Contentful
-
Select the Hayden’s Hub space. (this should be selected by Default)
-
Click on the Content tab in the top menu.
-
Use the content type filter (dropdown) to see entries for a specific model, like:
- homepage
- team
- faq
- author
- guidelines and many more…
How to Add or Edit an Entry
Section titled “How to Add or Edit an Entry”You only need one workflow for all content models:
- Open Content in Contentful Dashboard.
- Filter by Content Type (e.g.,
homepage,team,faq). - Choose one:
- Edit Existing Entry → Click the entry → Update fields → Publish.
- Add New Entry → Click Add Entry → Choose the Content Type → Fill required fields → Publish.
Publishing Notes:
- Published: Visible on the website.
- Draft / Changed: Saved but not live until published.
- Unpublished: Hidden from the site, but still stored.
How to Add Images
Section titled “How to Add Images”- Click on the Add media button.
- You will see two options:
- Add existing media
- Add new media
- If the image already exists in Contentful:
- Choose Add existing media.
- Browse through the list of available images.
- Select the image you want.
- Done! The image is now linked to your entry.
- If the image is new:
- Click Add new media.
- Fill in all required details (like title/description for accessibility).
- Use the file selector to upload the image.
- Once uploaded, you’ll see editing tools (including Crop Image).
- Crop the image if needed.
- Publish the image to make it usable on the website.
How to Delete an Existing Entry
Section titled “How to Delete an Existing Entry”- Open Contentful and click on the entry to open the Editor Dashboard.
- On the top-right corner, locate the three dots (⋯) above the Publish/Change Status button.
- Click the three dots menu.
- Select Delete.
- Confirm by clicking Permanently Delete.
- Done! The entry is removed from the website.
⚠️ Important:
Deleted entries cannot be restored. Double-check before permanently deleting anything.
Example: Viewing & Editing an Entry
Section titled “Example: Viewing & Editing an Entry”-
Go to the Content tab in Contentful.
-
Use the Content Type Filter dropdown and select Team.
-
You will see a list of all team members.
-
Click on an entry (e.g., Anjali Patel) to open the Editor Dashboard.
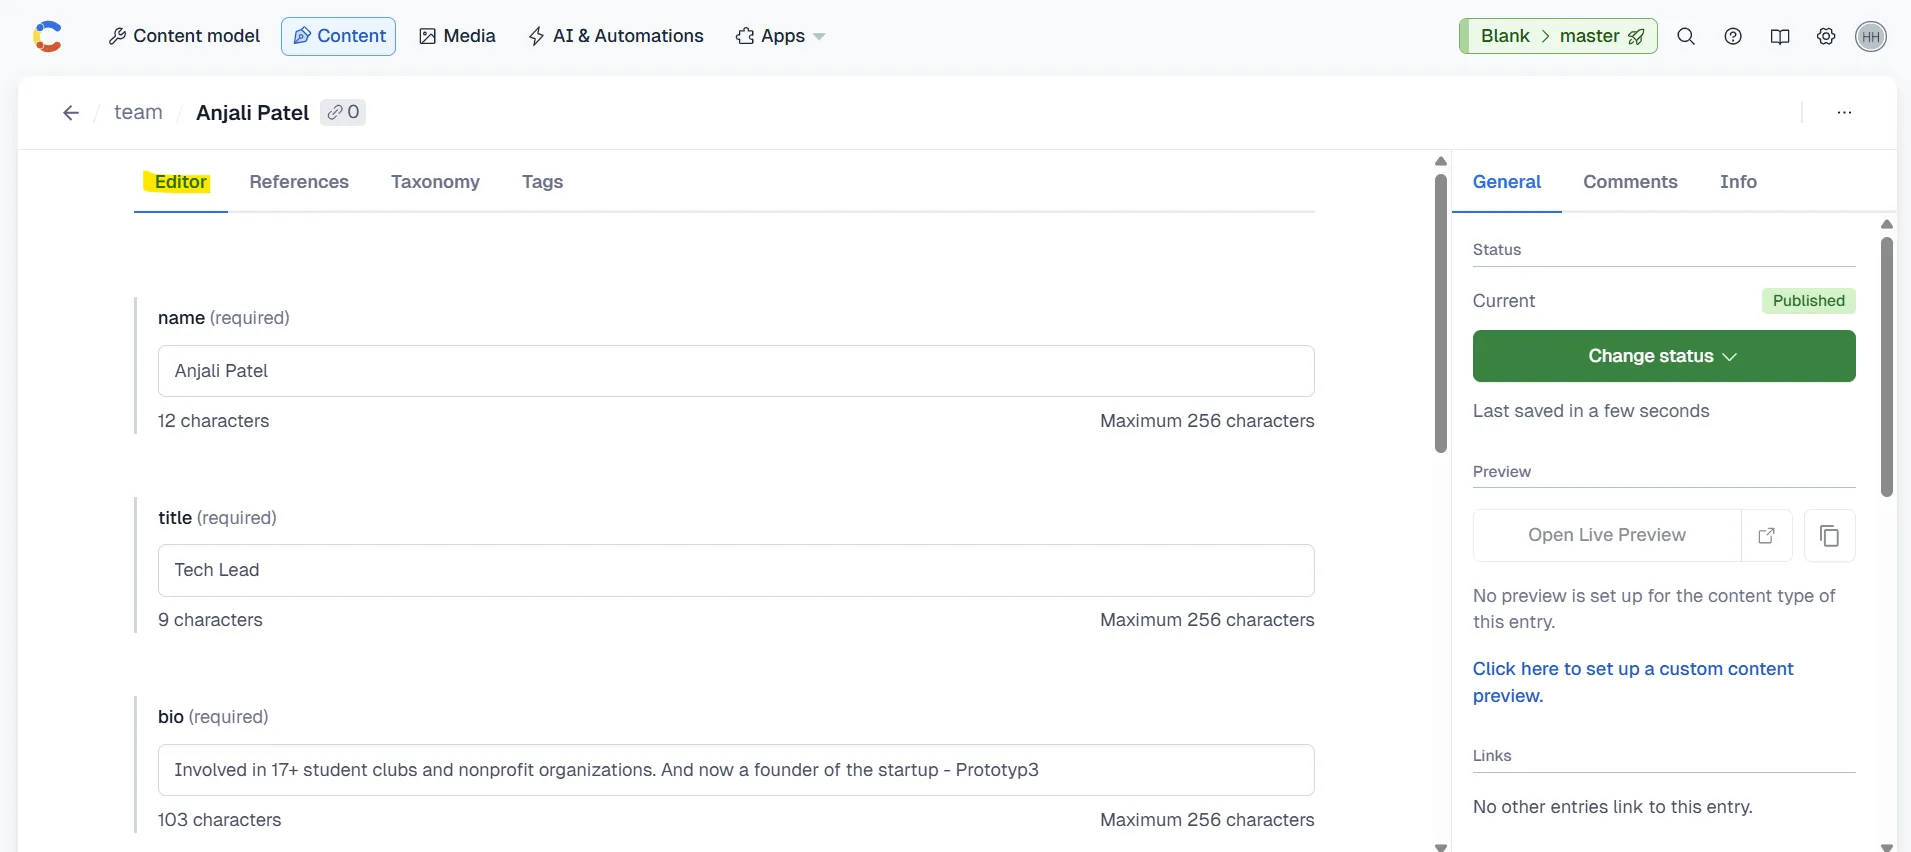
-
From this dashboard, you can edit fields like:
- Name: Anjali Patel
- Title: Tech Lead
- Bio: “Involved in 17+ student clubs and nonprofit organizations. Founder of Prototyp3.”
- LinkedIn:
https://www.linkedin.com/in/anjali-patel-3966b41a1/ - Headshot: (Uploaded image)
-
On the right panel, you’ll see the green Status / Publish button:
- Publish Changes – Makes edits live on the website.
- Change Status - Unpublish – Removes this entry from the website.
Live Update: Once published, the entry automatically appears in the Our Team section on the website.
Example: Adding an Entry
Section titled “Example: Adding an Entry”-
In the Content tab, on top-right corner, click blue Add Entry → Select Team.
(Or use the filter → “Team” → Add Entry button on the top right.)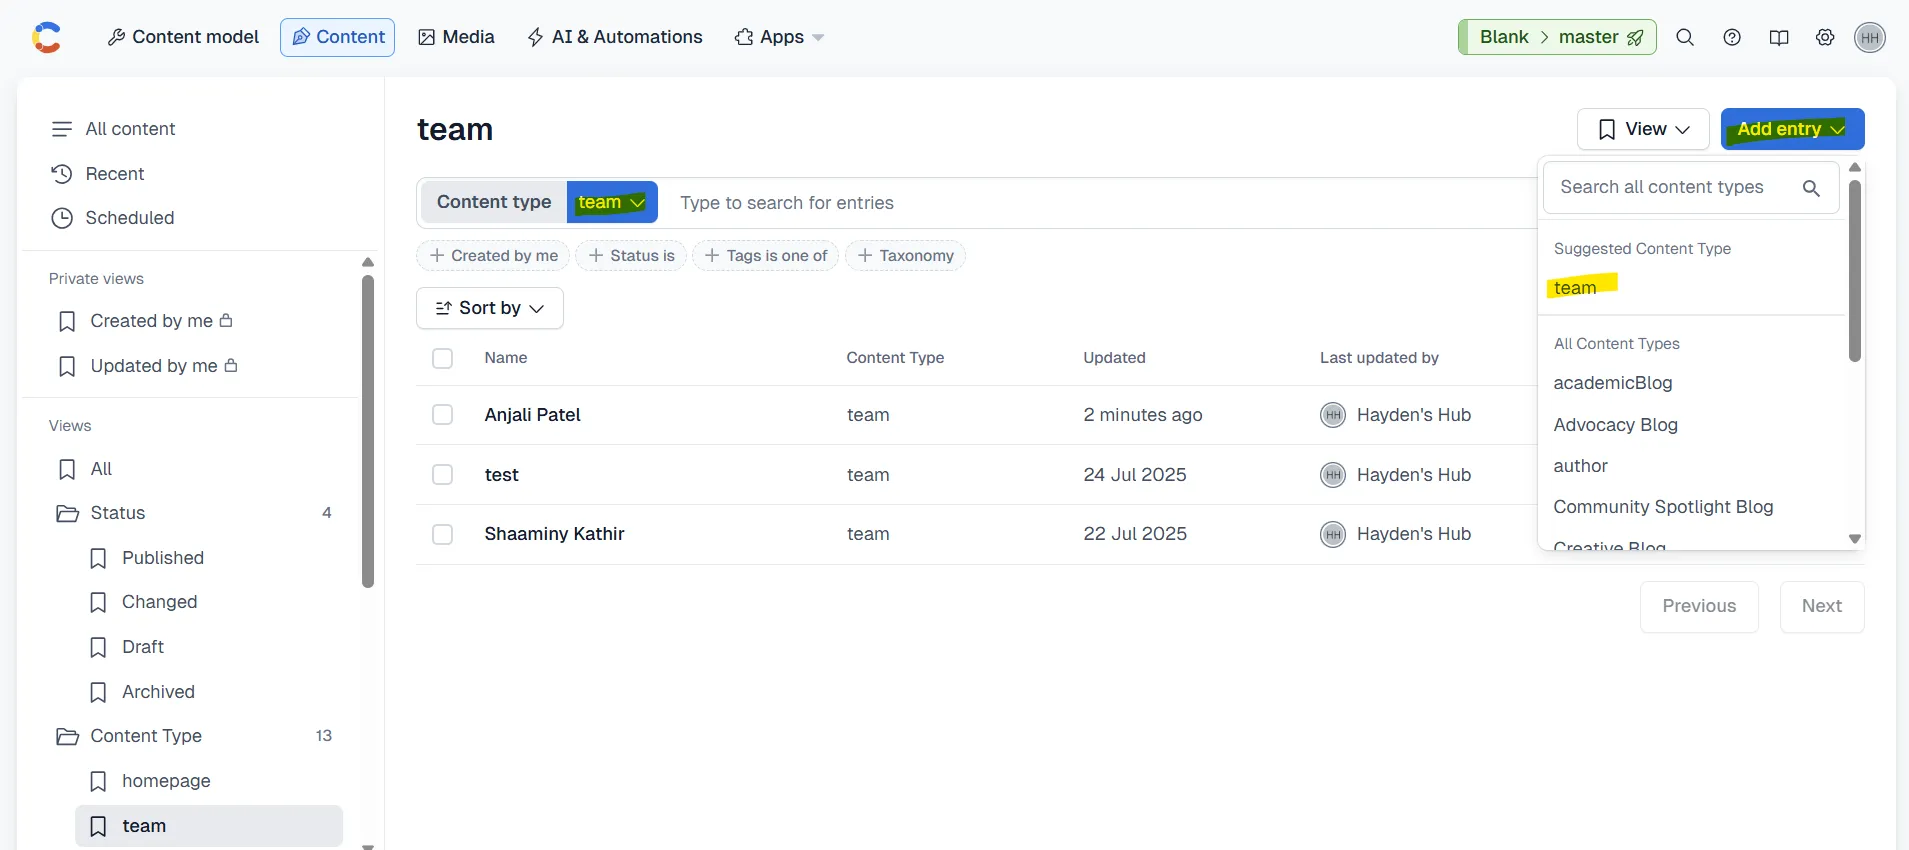
-
Fill in all required details (Name, Title, Bio, LinkedIn, Headshot).
-
Click the green Publish button.
-
Check the website – updates usually appear within a few seconds.
If not visible in 5 minutes, contact the Tech Lead for support.
Admin Tip:
You only need to add, edit, publish, or unpublish entries.
Never change or create new content models – developers handle that setup.